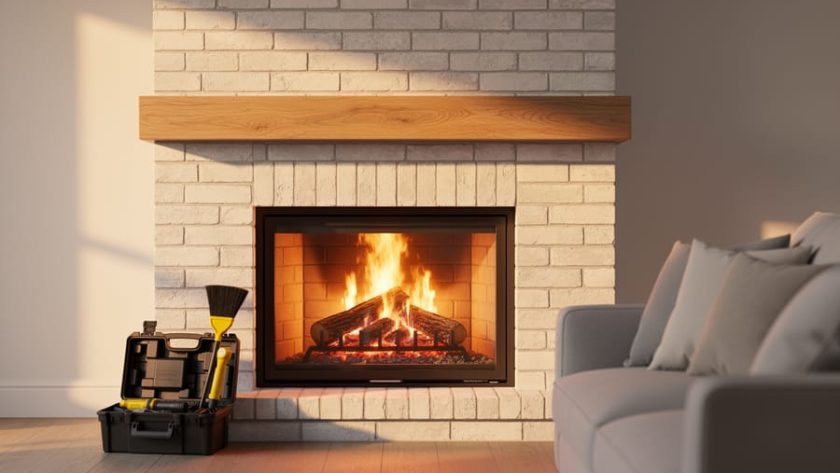
Your old fireplace holds incredible potential to become the stunning focal point your home deserves. That dated brick surround, crumbling mortar, and smoke-stained mantel can transform into a show-stopping architectural feature that blends character with modern style. But before you pick up a paintbrush or choose new tile, there’s something crucial every homeowner with an older property must understand: your chimney’s safety directly impacts your family’s wellbeing.
I’ve watched too many eager DIYers dive into beautiful fireplace makeovers only to discover hidden structural issues, creosote buildup, or ventilation problems that could have turned dangerous. The truth is, renovating an old fireplace isn’t just about aesthetics—it’s about creating a safe, functional heating source that works as beautifully as it looks.
This guide walks you through both sides of the transformation. You’ll learn essential chimney maintenance steps that protect your investment and your loved ones, from scheduling proper inspections to recognizing when damage requires professional attention. Then we’ll explore exciting design possibilities—painting brick, updating mantels, modernizing surrounds, and styling your renewed hearth with confidence.
Whether your fireplace has been neglected for years or simply needs refreshing, combining safety-first practices with creative vision means you’ll enjoy your makeover for decades. Some repairs definitely need professional chimney repair Tampa Bay expertise, while other updates become satisfying weekend projects that immediately elevate your space.
Why Your Old Fireplace Deserves More Than Just Cleaning
I’ll never forget the day I really looked at my grandmother’s old fireplace—not just at it, but into it. There it sat, this gorgeous architectural feature that had warmed countless family gatherings, now dulled by years of soot and neglect. It struck me then: this wasn’t just another household chore. This was an opportunity hiding in plain sight.
Here’s the thing about old fireplaces that most people don’t realize—they’re doing double duty in your home, whether you acknowledge it or not. On one hand, there’s the practical side: your chimney system is working hard behind the scenes, managing smoke, preventing carbon monoxide buildup, and keeping your home safe from fire hazards. But on the other hand, your fireplace is literally the heart of your living space, the natural gathering spot that draws everyone in on chilly evenings.
Older homes especially have fireplace personalities all their own. Unlike modern, cookie-cutter installations, vintage fireplaces were often built with unique dimensions, materials, and craftsmanship that reflect their era. That beautiful character comes with responsibility, though. Mortar deteriorates over time, flue liners crack, and dampers wear out—issues that aren’t always visible during a quick glance.
The beautiful truth is that addressing the safety essentials doesn’t mean sacrificing style. Actually, it’s quite the opposite. Once you commit to properly maintaining your chimney system, you’re already halfway to creating that stunning focal point you’ve been pinning on your inspiration boards. A clean, structurally sound fireplace becomes the perfect canvas for your creative vision—whether that’s exposing original brick, adding a fresh mantel, or simply giving it the attention it deserves.
The Safety Check: What Your Chimney is Trying to Tell You
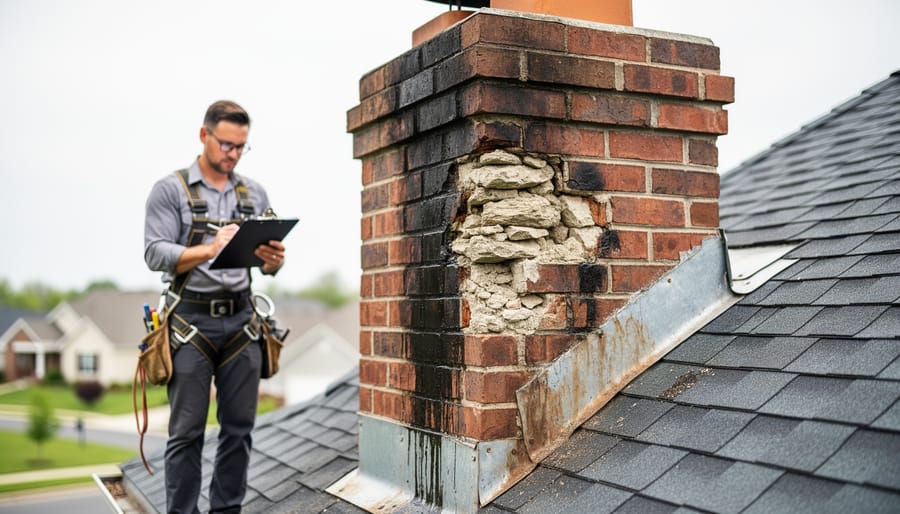
Signs Your Chimney Needs Professional Attention
Your fireplace might be charming, but it’s trying to tell you something important. Learning to read these warning signs saved my neighbor from a potentially dangerous situation last winter, and I want to share what I’ve learned along the way.
Start by looking at the mortar between your chimney bricks. If it’s crumbling, flaking, or you can scrape it away easily with a butter knife, that’s your chimney waving a red flag. Water stains on walls near the fireplace or ceiling spots below the chimney are another telltale sign that moisture is sneaking in where it shouldn’t be.
When you light a fire, does smoke drift back into your room instead of heading up and out? This isn’t just annoying; it’s a safety concern that needs professional evaluation. Similarly, if you notice a persistent smoky smell even when the fireplace isn’t in use, or if you spot chunks of clay tile in the firebox, it’s time to make that call.
Here’s something I never expected: animal nests. Birds, squirrels, and raccoons love chimneys, but their homes become serious fire hazards. If you hear scratching or chirping, don’t try to evict them yourself.
While you can tackle painting and decorating, structural issues, draft problems, and significant deterioration require certified chimney professionals. Think of it this way: the pretty stuff is your territory, but the safety stuff needs expert eyes. There’s absolutely no shame in calling for help when your home’s wellbeing is on the line.
The Pre-Makeover Inspection Checklist
Before you dive into the exciting transformation ahead, let’s talk about giving your fireplace and chimney a thorough once-over. Think of this as a friendly conversation with your home, where it gets to tell you what it needs. I remember inspecting my grandmother’s fireplace for the first time, flashlight in hand, discovering a century of stories written in soot and brick. You’re about to do the same.
Start by grabbing a good flashlight and peering up into your chimney flue. Look for any obvious cracks, crumbling mortar, or creosote buildup that looks thick and crusty. Don’t worry if you spot some issues. Most old chimneys have them, and identifying problems now means you’re already winning. If the buildup looks substantial or you see significant damage, you’ll want to call in a professional chimney sweep before proceeding.
Next, test your damper by opening and closing it several times. Does it move smoothly, or does it stick and groan like it hasn’t budged since the last century? A functional damper is your best friend for energy efficiency and preventing unwanted guests like birds or squirrels from dropping in.
Now examine the firebox itself, those inner walls where the magic happens. Run your hand gently along the brick or stone. Are pieces loose or flaking? Check for any cracks wider than a pencil line. These details matter for both safety and the stunning makeover you’re planning.
Finally, step back and assess the overall structure. Look for any signs of water damage, staining, or tilting. Check the hearth for stability and the surrounding walls for heat damage. You’re not just preparing for a makeover; you’re becoming your home’s best advocate, ensuring years of cozy fires ahead.
Planning Your Fireplace Makeover: Dream Big, Start Smart
Choosing a Style That Honors Your Home’s Character
Here’s the wonderful truth about older homes—they already have character waiting to be highlighted, not hidden. When giving your fireplace and chimney a makeover, the best approach often celebrates what makes your house special rather than fighting against it.
If your home has original brick or stonework, consider restoring rather than covering. I once helped a friend strip decades of paint from her 1920s brick fireplace, and what we discovered underneath was absolutely stunning. Sometimes a thorough cleaning and repointing is all you need to bring back that authentic charm.
For farmhouse style enthusiasts, shiplap surrounds, reclaimed wood mantels, and creamy white paint create that cozy, welcoming vibe. If you’ve already tackled DIY farmhouse projects elsewhere in your home, carrying that aesthetic to your fireplace creates beautiful flow. Think simple lines, natural textures, and that lived-in warmth.
Traditional homes shine with classic mantels in rich wood stains, decorative tile surrounds, or carefully preserved ornamental details. Don’t be afraid to embrace the elegance your home was built with.
For an updated classic approach, keep architectural details but refresh with modern colors. A deep charcoal or sage green can honor traditional style while feeling current and fresh.
The key is asking what your home wants to be. Walk through other rooms, notice the woodwork and architectural details, then let your fireplace makeover speak the same language. Your house will thank you for listening.
Budget-Friendly Approaches vs. Full Renovation
Let’s talk money, because I know that’s often the elephant in the room when you’re staring at a sad, outdated fireplace. The good news? You’ve got options at every price point, and you can create real impact without breaking the bank.
If you’re working with a tight budget (under $300), focus on transformative basics. A fresh coat of heat-resistant paint can completely reimagine your fireplace surround. Add a refinished vintage mantel from a salvage shop or Facebook Marketplace, swap out the screen or doors, and suddenly you’ve got a whole new focal point. I’ve seen friends make jaw-dropping changes with just paint and elbow grease.
Mid-range makeovers ($500-$2,000) let you dive deeper. Here you can retile the surround, install a beautiful reclaimed wood mantel, update the hearth, or even add decorative elements like corbels or built-in shelving. This tier often delivers the best bang for your buck.
Full renovations ($3,000 and up) involve structural work: rebuilding the firebox, relining the chimney, or completely redesigning the surround with custom stonework or tile. While pricey, these projects address both safety and aesthetics simultaneously, making them worthwhile investments in older homes where chimney integrity might be questionable.
Start where your budget allows, knowing you can always build on your foundation later.
The Chimney Makeover: Beyond What Shows
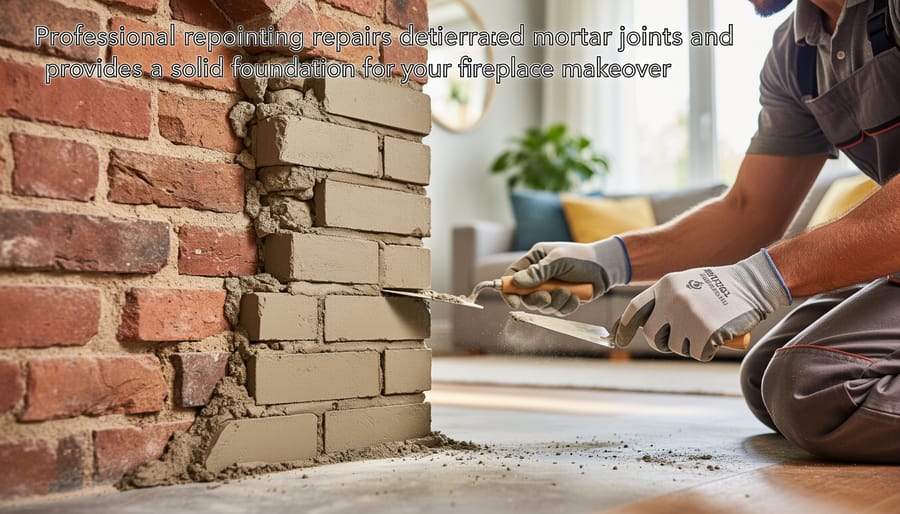
Repointing and Repair: The Foundation of Your Makeover
Before you dive into the exciting visual transformation of your fireplace, let’s talk about what’s happening behind the scenes. Think of repointing and structural repairs as the unsung heroes of your makeover—they’re not glamorous, but they’re absolutely essential.
Repointing is simply replacing the crumbly, deteriorating mortar between your chimney bricks. Over time, weather and age break down that mortar, creating gaps where water can sneak in and cause serious damage. If you gently press a screwdriver into your chimney’s mortar joints and chunks come away easily, it’s time for repointing.
Your chimney cap and flashing also deserve attention. The cap sits on top of your chimney like a protective hat, keeping rain and critters out. Flashing is the metal seal where your chimney meets your roof. Both are critical waterproofing elements that often need replacing in older homes.
Here’s the honest truth about DIY versus professional work: repointing small interior sections around your fireplace opening can be a satisfying weekend project if you’re comfortable with basic masonry. I tackled my own firebox repointing last spring and felt like a total rockstar afterward. However, exterior chimney work, flashing repairs, and anything involving heights or structural concerns should absolutely go to a certified chimney professional. Safety first, always.
Getting these foundational repairs handled means your beautiful makeover will last for decades, not just seasons.
Cleaning and Lining: The Invisible Upgrade
Before you fall in love with that freshly painted brick or new mantel design, let’s talk about what’s happening inside your chimney—because honestly, this invisible work is where the real magic happens.
When my neighbor Sarah tackled her 1920s fireplace makeover, she almost skipped the professional chimney inspection to save money. Thank goodness she didn’t. The sweep discovered a cracked flue liner that could have caused dangerous carbon monoxide leaks. What seemed like an unnecessary expense became the most important investment of her entire project.
Here’s the thing: old chimneys weren’t built with the same standards we have today. Many lack proper liners altogether, or have clay liners that have deteriorated over decades of use. A professional chimney sweep does more than just remove creosote buildup—they’re your safety detectives, spotting cracks, blockages, and structural issues you’d never see from the hearth.
Installing or repairing a chimney liner transforms how efficiently your fireplace operates. Modern stainless steel liners channel heat properly, prevent dangerous gases from seeping into your walls, and actually help your fireplace draw better. You’ll notice warmer fires that use less wood and produce less smoke.
Yes, this isn’t the glamorous part of your makeover. Nobody’s sharing chimney liner photos on social media. But knowing your family is safe while enjoying those cozy fires? That’s the upgrade that truly matters, even if guests never see it.
Transforming the Firebox and Surround
Cleaning and Preparing Brick or Stone
Before you can transform your old fireplace into a stunning focal point, you’ll need to tackle what’s likely decades of built-up soot and grime. Trust me, I learned this the hard way when I dove into painting my grandmother’s fireplace without proper prep—the paint wouldn’t stick, and I ended up doing everything twice!
Start by protecting your floor with drop cloths and opening windows for ventilation. Mix a solution of one cup trisodium phosphate (TSP) with a gallon of warm water, or use a TSP substitute if you prefer something gentler. Wearing rubber gloves and safety glasses, scrub the brick or stone using a stiff bristle brush, working in small sections from top to bottom. For stubborn soot stains, create a paste with dish soap and table salt, let it sit for ten minutes, then scrub away.
Rinse thoroughly with clean water and a sponge, changing the water frequently until it runs clear. This step is crucial—any residue left behind will interfere with paint or sealant adhesion. Allow the surface to dry completely for at least 24 hours. Run your hand across the brick; it should feel clean and slightly rough, providing the perfect tooth for whatever treatment comes next.
Paint, Whitewash, or Restore? Choosing Your Finish
Here’s the beautiful thing about fireplace makeovers: you get to choose your own adventure! Each finishing option brings its own personality to your space, and honestly, there’s no wrong answer here.
If you’re craving that fresh, farmhouse vibe, paint is your best friend. It’s forgiving for beginners and transforms tired brick almost instantly. Use high-heat paint near the firebox and quality masonry paint elsewhere. Pro tip from my own kitchen disaster-turned-success: always prime first! I learned this the hard way when my first coat soaked into the brick like a sponge. Two coats of primer plus two finish coats usually does the trick.
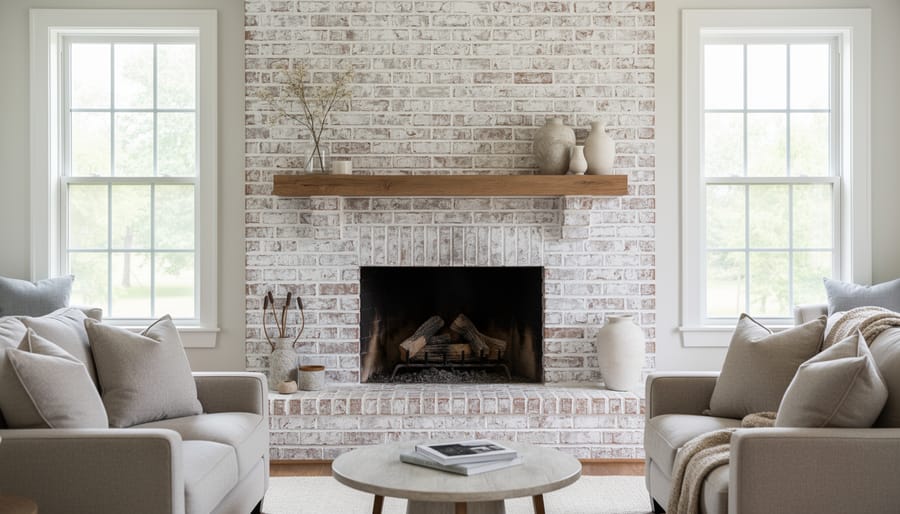
Whitewash offers that dreamy, lived-in look where the brick texture still peeks through. Mix equal parts white latex paint and water, then brush it on and immediately wipe back with a damp cloth. You control how much coverage you want, which feels wonderfully freeing for creative souls who hate commitment.
For purists with gorgeous original brick, restoration might be your calling. This means deep cleaning with a wire brush and TSP solution, then sealing to protect. It’s more labor-intensive, but preserving those historic materials feels incredibly rewarding.
Whatever you choose, work in small sections and step back frequently to assess your progress. Your fireplace has waited decades for this moment, so take your time and enjoy watching it come back to life beneath your hands.
Updating the Hearth and Surround Materials
Transforming your hearth and surround can completely change the feel of your fireplace, and you have more options than you might think! If you’re working with brick or stone that’s seen better days, consider giving it a fresh look with paint or limewash for a soft, aged appearance. I remember tackling my own dated brick surround with high-heat paint, and the difference was absolutely stunning.
For a more dramatic update, peel-and-stick tile has come incredibly far in recent years. These products are surprisingly durable and come in gorgeous patterns that mimic everything from subway tile to intricate mosaics. The best part? Most install in an afternoon with minimal tools required.
Stone veneer panels offer another accessible option, creating that authentic stacked stone look without the weight or expense of real stone. When working with any adhesive project, choosing the right adhesive matters tremendously, especially around heat sources. Always select products rated for high temperatures.
Refinishing existing marble or slate surrounds often just needs a good cleaning with specialized stone cleaner and resealing. Sometimes the beauty was there all along, just hiding under decades of soot and grime. Whatever route you choose, protect your floors with drop cloths and work in sections to avoid feeling overwhelmed.
The Mantel Moment: Creating Your Focal Point
Restoring an Original Mantel
Here’s a secret I learned from my neighbor’s 1920s bungalow renovation: underneath layers of paint, her mantel was stunning oak just waiting to shine again. Restoring a vintage mantel takes patience, but the payoff is absolutely worth it.
Start by testing paint layers for lead, especially in homes built before 1978. Once you’re clear, use a chemical stripper designed for wood, working in small sections with a plastic scraper. I always keep the windows open and wear gloves—those fumes are no joke! For stubborn spots, try a gentle heat gun, keeping it moving to avoid scorching the wood.
Once stripped, inspect for damage. Wood filler works wonders for small gouges and nail holes. Sand gradually, starting with medium-grit paper and finishing with fine-grit for that butter-smooth surface. This process mirrors many DIY furniture restoration techniques you might already know.
For finishing, let the wood’s character guide you. A clear polyurethane showcases natural grain beautifully, while stain can deepen richness. Test your finish on the mantel’s underside first—you’ll thank yourself later! The transformation from painted-over relic to showpiece centerpiece will make your whole room sing.
Installing a New Mantel That Looks Like It Belongs
Finding the right mantel is like discovering the perfect picture frame for your fireplace. It should honor your home’s original character while giving the space a fresh, finished look.
Start by studying the architectural details around your home. Notice the door and window trim, crown molding, and any existing woodwork. Your new mantel should echo these elements rather than clash with them. For Victorian homes, look for mantels with decorative corbels or ornate details. Craftsman-style houses shine with simple, geometric designs and clean lines. Colonial homes typically feature straightforward, symmetrical mantels with classic proportions.
When I installed my first mantel, I learned that proper anchoring makes all the difference. Locate your wall studs using a stud finder and mark them clearly. Most mantels attach with heavy-duty brackets or French cleats secured directly into studs. Pre-drill all holes to prevent splitting the wood, and always check for level as you work. Remember that drywall anchors alone won’t safely support a mantel’s weight.
Consider the scale carefully. Your mantel should feel substantial without overwhelming the fireplace opening. A good rule of thumb is making it slightly wider than the firebox but proportional to the wall.
Take your time with this step. The mantel becomes the architectural anchor for your entire makeover.
Finishing Touches That Make It Feel Complete
After all your hard work on the chimney inspection and fireplace makeover, it’s those final touches that transform your fireplace from simply renovated to genuinely inviting. Think of these details as the accessories that complete an outfit—they’re what make your space feel intentional and loved.
Start with a beautiful fireplace screen that complements your new design. I learned this the hard way when I left my freshly painted fireplace without one, and a stray ember left a small burn mark on my new rug. Beyond safety, screens add texture and visual interest. Look for ones with decorative metalwork that echoes your home’s architectural style—ornate for Victorian homes, cleaner lines for craftsman styles.
Quality fireplace tools deserve a spot too. A matching set of poker, brush, and shovel arranged in a handsome stand makes tending fires easier while looking purposeful. I found a vintage brass set at an estate sale that I polished up, and it’s become a conversation starter.
Now for the fun part—styling your mantel and hearth. Rotate displays seasonally to keep things fresh. In fall, arrange pumpkins and autumn branches. Winter calls for evergreen garlands and seasonal decor ideas like wreaths. During warmer months when the fireplace isn’t in use, fill the firebox with stacked birch logs, potted ferns, or DIY candles in glass hurricanes for that cozy glow without the heat.
Layer in personal touches—framed family photos, collected treasures, or artwork that speaks to you. Remember, there’s no single right way to style your space. What matters is creating a fireplace area that welcomes you home every single day.
Look at you! You’ve journeyed through the ins and outs of transforming your old house fireplace and chimney, and what a transformation it is. From understanding the importance of safety inspections to choosing that perfect paint color or styling your mantel with treasures that tell your story, you’ve tackled it all with courage and creativity.
Here’s the beautiful truth about older homes: maintaining a safe, functional chimney and creating a stunning fireplace design aren’t separate projects. They’re two sides of the same coin. When you invest in proper chimney upkeep, you’re protecting your home and your family. When you pour creativity into the visual details, you’re honoring the character and history that makes your space special. Together, they create something truly magical.
Now comes the best part – actually enjoying your newly transformed space. Light that first fire, curl up with a cozy blanket, and soak in all the hard work you’ve accomplished. You’ve created more than just a functional heating source. You’ve crafted a gathering place, a focal point that welcomes everyone who enters your home.
We’d absolutely love to hear about your fireplace makeover journey! What surprised you most during the process? Did you uncover any hidden treasures behind old brick? Share your before-and-after photos, your clever solutions, and even your mishaps in the comments below. Your story might be exactly what inspires someone else to start their own transformation. Here’s to warm fires and beautiful spaces!


